Last modified June 26, 2026
Deploying Ray clusters with KubeRay on Giant Swarm
Ray is a unified framework for scaling AI and Python applications. It provides a simple, universal API for building distributed applications and includes libraries for machine learning, reinforcement learning, and hyperparameter tuning. KubeRay is the official Kubernetes operator for Ray that automates the deployment, scaling, and management of Ray clusters on Kubernetes.
Key benefits of using Ray with KubeRay on Giant Swarm:
- Scalable distributed computing: Automatically scale Ray clusters based on workload demands
- Native Kubernetes integration: Leverage Kubernetes features like resource management, networking, and monitoring
- Machine learning workflows: Run distributed training, hyperparameter tuning, and inference workloads
- Resource efficiency: Dynamic resource allocation and cluster autoscaling
Prerequisites
Before starting this tutorial, ensure you have:
- A running Giant Swarm workload cluster with sufficient resources
kubectlconfigured to access your workload cluster- Basic understanding of Kubernetes concepts (pods, services, deployments)
- Familiarity with Python and distributed computing concepts
Installing the KubeRay operator
The KubeRay operator manages the lifecycle of Ray clusters on Kubernetes. You can install it using the Giant Swarm App Platform.
Using the App Platform
Create an App resource to install the KubeRay operator from the Giant Swarm catalog:
export CLUSTER=your-cluster-id
export ORGANIZATION=your-org-id

kubectl gs template app \
  --catalog=giantswarm \
  --cluster-name=${CLUSTER} \
  --name=kuberay-operator \
  --organization=${ORGANIZATION} \
  --target-namespace=kuberay-system \
  --version=1.1.0 2>/dev/null > kuberay-operator.yaml

kubectl apply -f kuberay-operator.yaml
Note: kubectl gs template app may print a deprecation banner in latest releases of kubectl gs related to a transition how apps are deployed. That is why we are redirecting the stderr.
Verifying the installation
Check that the KubeRay operator is running:
$ kubectl get pods -n kuberay-system

NAME                                READY   STATUS    RESTARTS   AGE
kuberay-operator-7b5c8f6d4b-xyz12   1/1     Running   0          2m
Verify that the Custom Resource Definitions (CRDs) are installed:
$ kubectl get crd | grep ray

rayclusters.ray.io                    2026-05-19T10:00:00Z
rayjobs.ray.io                        2026-05-19T10:00:00Z
rayservices.ray.io                    2026-05-19T10:00:00Z
Deploying a Ray cluster
Once the KubeRay operator is installed, you can deploy Ray clusters using the RayCluster custom resource.
Basic Ray cluster configuration
Create a basic Ray cluster configuration. The manifest below works on a standard Giant Swarm workload cluster with PSS-restricted policies enforced by Kyverno (the default on most installations):
apiVersion: ray.io/v1
kind: RayCluster
metadata:
  name: sample-raycluster
  namespace: default
spec:
  rayVersion: '2.50.1'
  enableInTreeAutoscaling: true
  # The operator injects an autoscaler sidecar into the head pod when
  # enableInTreeAutoscaling is true. PSS-restricted clusters reject it
  # unless we set its securityContext explicitly.
  autoscalerOptions:
    securityContext:
      runAsNonRoot: true
      runAsUser: 1000
      allowPrivilegeEscalation: false
      seccompProfile:
        type: RuntimeDefault
      capabilities:
        drop: [ALL]
  headGroupSpec:
    rayStartParams:
      dashboard-host: '0.0.0.0'
      block: 'true'
    template:
      spec:
        securityContext:
          runAsNonRoot: true
          runAsUser: 1000
          runAsGroup: 100
          fsGroup: 100
          seccompProfile:
            type: RuntimeDefault
        containers:
        - name: ray-head
          image: rayproject/ray:2.50.1
          securityContext:
            runAsNonRoot: true
            runAsUser: 1000
            allowPrivilegeEscalation: false
            seccompProfile:
              type: RuntimeDefault
            capabilities:
              drop: [ALL]
          ports:
          - containerPort: 6379
            name: gcs-server
          - containerPort: 8265
            name: dashboard
          - containerPort: 10001
            name: client
          resources:
            # 4Gi memory is the practical minimum for the head: the Ray
            # dashboard subprocesses sit around ~1.94Gi on idle, so a 2Gi
            # limit OOMs the moment you submit a job.
            limits:
              cpu: "2"
              memory: "4Gi"
            requests:
              cpu: "1"
              memory: "2Gi"
  workerGroupSpecs:
  - replicas: 2
    minReplicas: 1
    maxReplicas: 5
    groupName: small-group
    rayStartParams: {}
    template:
      spec:
        securityContext:
          runAsNonRoot: true
          runAsUser: 1000
          runAsGroup: 100
          fsGroup: 100
          seccompProfile:
            type: RuntimeDefault
        containers:
        - name: ray-worker
          image: rayproject/ray:2.50.1
          securityContext:
            runAsNonRoot: true
            runAsUser: 1000
            allowPrivilegeEscalation: false
            seccompProfile:
              type: RuntimeDefault
            capabilities:
              drop: [ALL]
          resources:
            limits:
              cpu: "2"
              memory: "2Gi"
            requests:
              cpu: "1"
              memory: "1Gi"
Save this configuration as ray-cluster.yaml and apply it:
kubectl apply -f ray-cluster.yaml
Note: The manifest above schedules Ray workers on any node. If you want workers to land on GPU nodes, add a runtimeClassName: nvidia plus a toleration for the nvidia.com/gpu taint to the worker template.spec. Drop those settings on non-GPU clusters, they prevent scheduling there.
Verifying the Ray cluster deployment
Check the status of your Ray cluster:
$ kubectl get raycluster

NAME                DESIRED WORKERS   AVAILABLE WORKERS   CPUS   MEMORY   GPUS   STATUS   AGE
sample-raycluster   2                 2                   6      6Gi      0      ready    3m
List the Ray cluster pods:
$ kubectl get pods -l ray.io/cluster=sample-raycluster

NAME                                          READY   STATUS    RESTARTS   AGE
sample-raycluster-head-xxxxx                  2/2     Running   0          3m
sample-raycluster-small-group-worker-xxxxx    1/1     Running   0          3m
sample-raycluster-small-group-worker-yyyyy    1/1     Running   0          3m
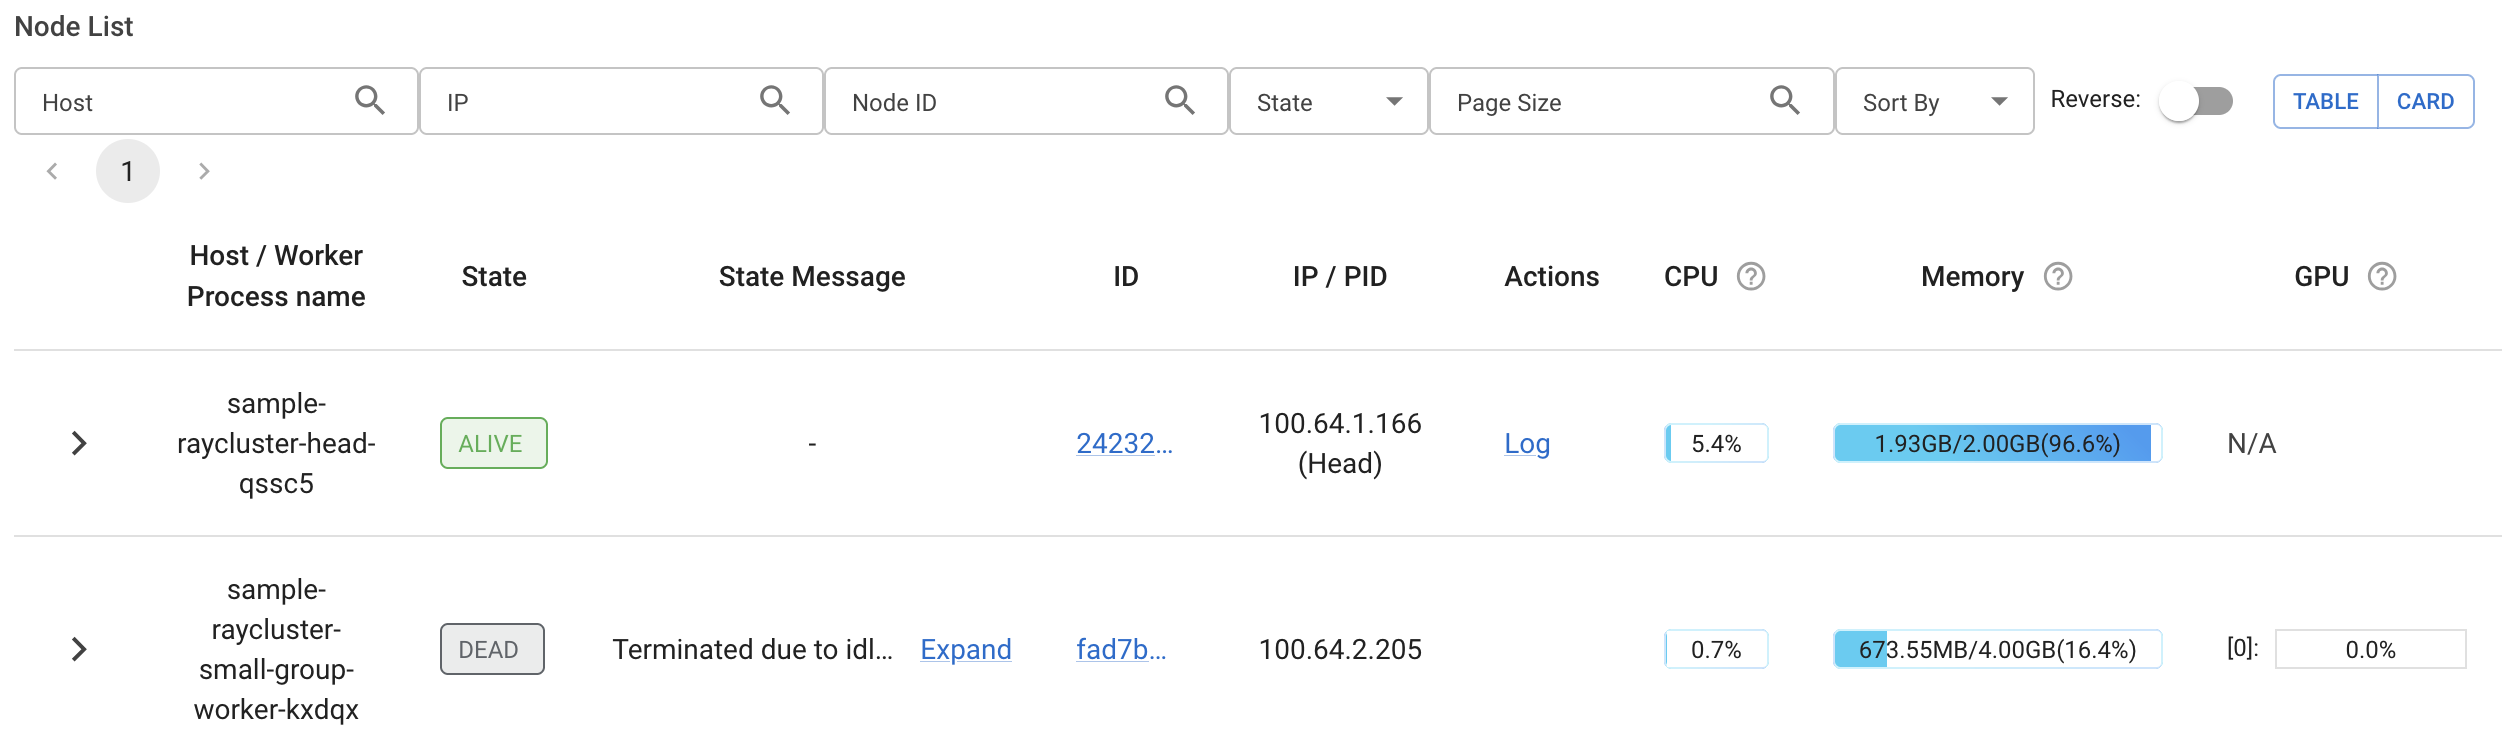
The head pod shows 2/2 containers because the operator injects an autoscaler sidecar alongside the Ray head when enableInTreeAutoscaling: true.
Accessing the Ray cluster
Using the Ray Dashboard
The Ray Dashboard provides a web interface for monitoring your Ray cluster. Forward the dashboard port to access it locally:
kubectl port-forward service/sample-raycluster-head-svc 8265:8265
sample-raycluster-head-svc is a headless service (ClusterIP: None), but kubectl port-forward resolves it to the head pod and works the same way.
Open your browser and navigate to http://localhost:8265 to access the Ray Dashboard.
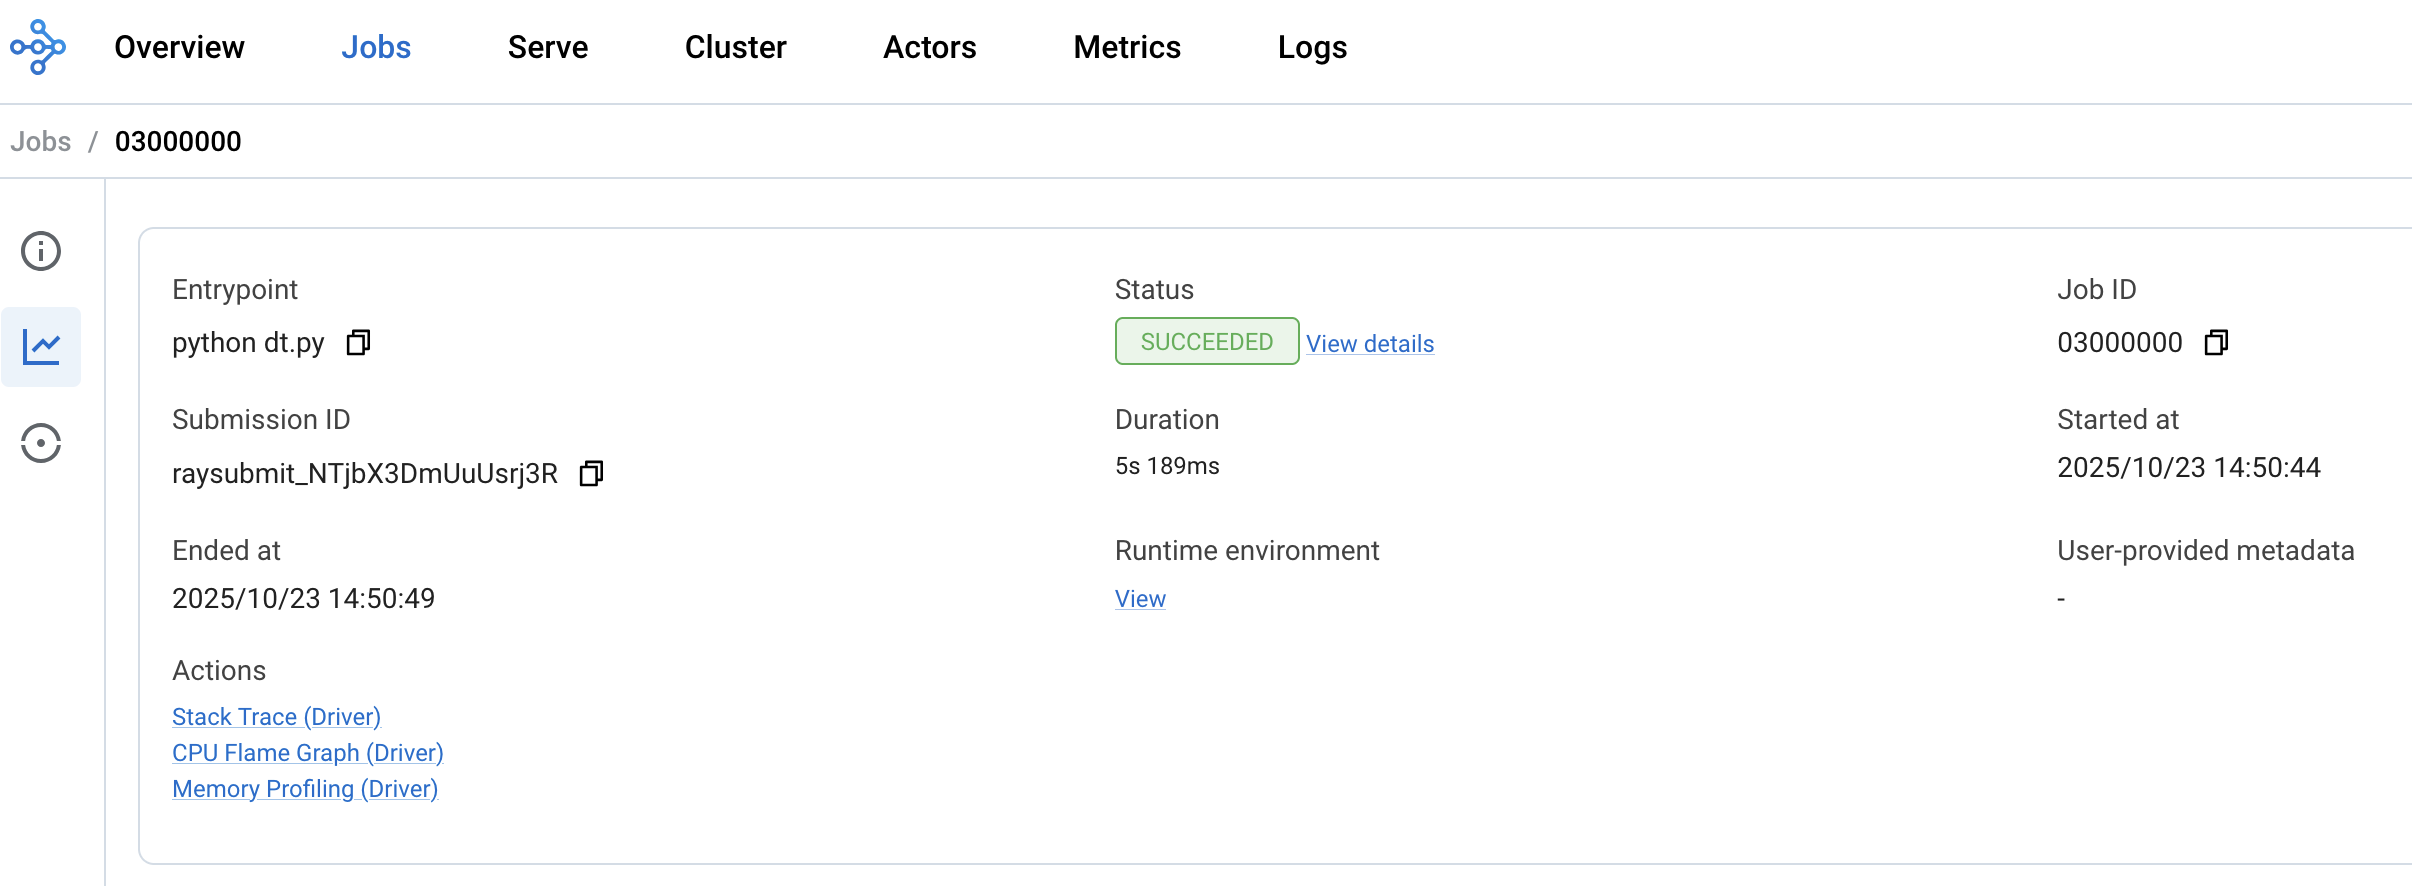
Running a test job
Once your Ray cluster is running, submit a computing job to validate it. We’ll calculate the value of π using the Monte Carlo method. The Python script lives in this gist.
Make sure the dashboard port is still forwarded:
kubectl port-forward service/sample-raycluster-head-svc 8265:8265
You can submit the job in two ways.
Option A: Ray CLI
Install the Ray client if you don’t already have it:
pip install -U "ray[default]"
Then submit the job. The working_dir points at the gist so you don’t need a local copy:
ray job submit \
  --address="http://localhost:8265" \
  --runtime-env-json='{"pip": ["numpy"], "working_dir": "https://gist.githubusercontent.com/pipo02mix/a32771ec8358d338426c915e2b7a8078/archive/9bb509f37dba7edf09f042cee5e71f78aa0ccb10.zip"}' \
  -- python dt.py
Option B: REST API (no Python required)
If you don’t have Python or ray installed locally, submit the job directly with curl:
curl -X POST http://localhost:8265/api/jobs/ \
  -H "Content-Type: application/json" \
  -d '{
    "entrypoint": "python dt.py",
    "runtime_env": {
      "pip": ["numpy"],
      "working_dir": "https://gist.githubusercontent.com/pipo02mix/a32771ec8358d338426c915e2b7a8078/archive/9bb509f37dba7edf09f042cee5e71f78aa0ccb10.zip"
    }
  }'
The response includes a submission_id. Poll the status with:
curl -s http://localhost:8265/api/jobs/<submission_id>
Either way, observe in the dashboard how the job is executed in parallel and how resources are scaled based on load.
Further reading
Need help, got feedback?
We listen to your Slack support channel. You can also reach us at support@giantswarm.io. And of course, we welcome your pull requests!